Showing posts with label knitting. Show all posts

Wednesday, January 11, 2012

A quick hello!


Just a quick little hello!

I've been crazy busy writing and whipping up a lovely crochet shawl pattern that will debuting  (in a collection that I also helped edit) this Friday at Vogue Live.  As soon as it is live, I will be hooting up a storm about it, but I've been trying to not say anything about it.  You don't know how difficult it has been!  I can't shut up at the best of times.

Anyhow, I just got a little thrill today when a friend let me know that one of my patterns was mentioned in Alana Dakos' blog Never Not Knitting as one she used for making a gift for a friend.  Check out the little knitted owl on her post here.  The pattern (seen above) is Owls Two Ways, and both the crochet version and the knitted version are on the same pattern.  Yay for little owls!


Friday, June 3, 2011

Progress progresses

I promised you updates on my ships & seaside cowl. Well, here's all I've gotten done so far - but I've been working on other things at the same time. And here are my lovely colors - in lovely Malabrigo. Clockwise from the top left we have Bobby Blue, Emerald, Azul Profundo, and Vaa. The latter has some of those lovely olive colors that I referenced from the Turner painting, Fishermen at Sea (below). And some of the deep inky blues. You can see the stripes from the bottom two are working out well. The light green is just the crochet thread that I used for the provisional cast-on. No one will ever know it was there (except you, if you are reading this.) I chose the lighter emerald green and the light green-blue to be the brief contrast to the dark colors, as Turner did with the foam and reflections on the waves.
I have altered the original colors of the pattern, as well as reversing the dark and light tones. Because I can't leave well enough alone.

Wednesday, June 1, 2011

Ships & Seaside

I am starting on a lovely cowl as part of the Tiny Owl Knits group Summer 2011 KAL on Ravelry. The ship & seaside cowl. I chose colors based on this J.M.W. Turner painting - stormy, dark, and mysterious. I'll post photos as I work on it!


Monday, May 9, 2011

Tying up loose ends...


This is what I spent the last 7 weeks on. Actually, I spent the last 7 weeks making 2 of these. And there is no final picture - because I am a dork and forgot until after I had already delivered them.

The project was to reproduce 2 copies of an existing Christmas stocking that was more than 40 years old, from a pattern that is more than 50 years old. I was given a stocking, a photocopy of an old pattern, and asked if I could make 2 new close copies, with new names for new family members. They were knit flat for part (the leg and instep), in the round for part (the toe) intarsia for part (twin scary Santas,) stranded for part (names on both sides, and weird crossed candy canes,) stripes (the toe again,) and 3 jingle bells each. There was a back seam, seams on both of the heel gussets, a braid in 3 colors covering the back seam, and toes that had to conform to the original stocking, not the original pattern.

The part above is the section of intarsia where I was using 9 bobbins, butterflies, and balls of yarn for something less than 1 foot wide. It would have been 11, but I chose to add the 2 pairs of single stitch eyes in duplicate stitch.

The colors of the original were hard to match, but the person that commissioned them was quite pleased, thankfully. They are odd, but vintage. Interesting to make, but the finishing took about 10 hours - each.

I am trying this month to design 2 more crocheted bodice dresses, but I also am working on restoring an old crocheted afghan (I'm guessing from the early 1950s.) I WILL photograph the process, and I can tell it will be a very interesting challenge. Starting with loom-made daisies, I will be re-making parts of it, and I will then be repairing other parts. I was given lovely wool to match colors with, and I am so excited. Last month, I also worked on repairing another old crocheted afghan. I love repairs. It makes me want even more to go back to school to do textile conservation. We shall see...

In other news, I spent a couple of lovely evenings with a crowd of crochet folk. I was asked if I would be interested in starting up a local crochet guild, and I said yes. If you are in the Austin area, The Knitting Nest on South Congress will be hosting a gathering of people interested, and we will form a local chapter of the Crochet Guild of America. Save the date: Sunday, June 12, at 2pm. There will be food! Call Stacy at (512) 291-8866 to sign up, so we know how many to expect.

I had to cancel the Countdown to Harry Potter classes that I had designed - next to no response. I suspect Voldemort at work here.

I actually got on Twitter (@oceanofstitches) and I find that all of my postings are almost in Haiku form. My brain does not thrive perhaps on the 140 character limit. Or is it less?

I have asked my husband to keep an eye on my facebook and twitter accounts. I need to post more, and it seems easier to tell him what to post than sitting here assuming anyone is reading what I say. Right now, I am doing that but I might have him post soon. This space is mine, however. I may have him put up some photos for quick posts, but probably not.

I am trying to come up with classes to teach at both shops for the rest of the year. I am also trying to come up with whole series of knit and crochet courses. Occasionally, I sleep.

So there are my loose ends for the month. Let's hope I will be free enough to post more often!

Thursday, February 17, 2011

Owls Two Ways (free pattern)


I just popped in to post up a duet of free patterns - more owls. I created a pair of universal patterns for simple one-piece owls, one knitted and one crocheted. These 2 patterns are together in one PDF for FREE DOWNLOAD HERE! (Ravelry.com PDF download.)

Yay! More Owls!

Tuesday, February 15, 2011

New Post!


Whew! It has been a whirlwind of a month! First of all - Happy Day After Valentine's Day! I made these little crochet hearts for my family yesterday as my gift. But we celebrate for a few days, as love is important every day. I hope you are having a break in the cold (or hot) weather wherever you are. It has been crazy here! I live in central Texas, and while it gets a little cold here in the winter, it doesn't normally get below freezing for days and days! I know the weather has been horrid so far this year, but I hope it has given you a chance to snuggle up and craft.


I have been BUSY sample making for both of the yarn shops where I teach. I just found out yesterday (by randomly checking the schedule) that I will be teaching an extra class at the end of the month. So I whipped up an amigurumi cupcake (and a pattern) just for that. I might even be tempted to post it up.

In other news, I have been writing a blog post for a locally-based garment company - Emilime. I hope to write more of those soon, as well as getting a chance to blog here more.

Also, I have jumped into writing knitting patterns with charts using a bit of computer software. I will post soon to review the software I got last week.

Back to sample making - the set I am doing now is for a 5 month series - Countdown to Harry Potter - 8 Harry Potter-themed projects that are a mixture of knitted projects and crocheted projects. (Including 3 designs from me!) Check back soon for a full list of patterns!

Happy crafting!

Wednesday, November 17, 2010

Make your own ornaments!

Two knitted stars, an elf hat, a short-row pickle, a mini sock stocking, and a double-knit Norwegian Star snowflake.

An African Flower motif stocking, 2 crocheted stars, a curved crocheted pickle, a lace snowflake, a lace heart, and a little elf hat.

Starting November 26th and 27th, I will be teaching 10 different ornament classes. There will be 5 each of knitting and crochet (being fair to the various needle arts.) Above are the samples I created for each class. Call or visit The Knitting Nest in Austin Texas to sign up. Different ornaments will be offered on different days - knitted ones on Friday the 26th, and on Wednesdays thereafter; crocheted ones on Saturdays starting November 27th.

Escape the house, make your own ornaments (or gift toppers.)

Friday, November 12, 2010

Where am I?

Where am I? In the middle of stitch marker land, apparently. These are sets of knitting stitch markers that I just finished for sale at the Ravelry event at The Knitting Nest tomorrow, November 13. They are all made from 22 gauge sterling silver (so heavy duty, won't bend easily), Swarovski crystal beads (so, sparkly) and clear glass beads (also sparkly) and are all handmade and carefully finished (so not to snag the knitting.) There are 18 sets of 5 markers - and will be for sale from 10-11:30 am and 1-6pm during the Ravelry event. Any leftovers will go up for sale on my Etsy shop on Sunday. I will also have more project needle cases and sock needle envelopes for sale. I have also donated a special set of all 3 of these (stitch markers, project needle case, sock needle envelope) to the silent auction to raise funds for the American Cancer Society. This auction will be taking place all day tomorrow during the Ravelry event. The stitch markers are very special - sterling silver, freshwater pearl, and deep red, silver-lined vintage glass beads. The sock needle envelope is finished with a vintage glass button as well - the only one I've made in the true red wool felt. I made these in remembrance of all of my family members who have had cancer. That would be ALL of them, by the way. Only my siblings and kids and I have gone cancer-free so far. Spooky - the odds aren't good.

Mmm, sparkly and pastel.

Getting brighter.

Brighter still.

Ah, brightest yet.

I am very thankful that I have quite a few years of jewelry making under my belt. It made the process neater and faster. I will admit that wrapping the wire was a little difficult. The headpins that I used are heavier in gauge than I usually use for jewelry - but I wanted them to stand up to a lot of hard use. My fingers are sore - but they turned out pretty well, if I do say so myself.

Tuesday, October 26, 2010

I'll Be Teaching Next Week!


Starting next Tuesday, November 2, I will be teaching a Knitting 101 class! Tuesdays, November 2, 9, 16, and 30 from 7 - 8:30 pm at The Knitting Nest in Austin, TX. That is 6 hours of class time, in which students will learn how to cast on, knit, cast off, purl, knit in the round on circulars and double-pointed needles, increase, and decrease. A solid beginning course. The cost is $80 for six hours, plus materials. As I get the course fee, the store policy is that materials must be purchased at The Knitting Nest, so that classes may continue to be held there. Please come learn, if you are nearby; and support The Knitting Nest for giving me such a good venue at which to teach. Hope to see you there!

Thursday, October 21, 2010

The next big thing...

I coulda been a contender!

I just wanted to say thank you to the many people who sent me cheering messages in the last few weeks. It was a huge help - and probably the very thing I needed. I was tempted to throw my hands up and quit the teaching thing, but I would have been quitting one of the things that I love the best. I really love teaching knitting, crochet, and jewelry making. I love seeing the spark of understanding and the frisson of inspiration spread to those I teach. I love to share what I do, and make more of us out there. I love passing the gifts of the incredible teachers I have had to the next person. Thank you for encouraging me. I want to say a special thank you to Stacy, the owner of The Knitting Nest (Austin, TX) for supporting my efforts and encouraging me to teach. I will, in fact, be teaching holiday ornament classes there starting in November - both knitted ones and crocheted ones!

I have been busy the whole time I was preparing for classes. The above mitts are for my brother Martin's birthday (I can say that - only my brother Nick actually reads my blog.)

I just finished some for Badger - leftover Malabrigo from his hat last year. Buttons to match.

Rose has some, also made from leftover Malabrigo, to match her hat from last year - which I will admit is probably still a bit big. I am starting on more presents for the holidays. I also have to make Rose a gnome costume for Halloween this week. I am making her a red, dotted skirt, a blue, flowered shirt, and a little white pinafore. This will all be combined with her gnome hat to make her the sweetest gnome baby. I might even embroider flowers on her pinafore - let's see how the week goes.

I recently got a care package from my dear friend Laura. It was chock full of lovely, but here is one thing that she sent - recycled yarn from Washington State! Yay! I even like the name - Smart Monkey. They are on Etsy if you want some yourself. There is a local group that does the same thing, and I will be checking them out soon.

Here is something else I have been up to - more jewelry making. This is a 1.5 inch wide wool felt rose, with glass beads, a silk and wool leaf with pearl cotton embroidery. I made it as a gift for my Chiropractor. She is a very nice woman, but she has really been an immeasurable help to me. I actually leave my house because of her. My back had gotten so bad, that I mostly did not leave the house. Now look at me - going out and teaching.

I made a wool felt, scrap silk, vintage button, and embroidered bracelet.

Lined in a scrap piece of linen.

And a pair of chandelier earring to wear when I feel special. These were actually class samples I made for the classes that I was to be teaching. I bought the supplies, and made them to my tastes. They are definitely mine. They are Bali silver findings and sterling silver wire, beads, and Swarovski crystal beads.

The crystal beads are my favorite color name ever - padparadscha. These are a sort of an orangish, brownish, reddish pink.

Wikipedia states that "Padparadscha is a pink-orange corundum, with a low to medium saturation and light tone, originally being mined in Sri Lanka, but also found in deposits in Vietnam and Africa; Padparadscha sapphires are very rare and highly valued. The name derives from the Sinhalese word for lotus blossom.[8] Along with rubies, they are the only type of corundum to be given their own name instead of being called a particular colored sapphire. Padparadscha used to be a subvariety of ruby.[9] "

So, I am on to the next big thing, which is good for me, and I hope for the good of all.

Sunday, September 5, 2010

Oh, I forgot:

While I was busy making all of Badger's things, I made Rose a little shrug for the fall. It is the Whirligig Shrug by Stephanie Japel. I made it out of Knit One Crochet Two's 2nd Time Cotton - yay, recycled cotton. It is very splitty yarn, and the small acrylic content (25%) still kills my hands. But I had made Rose a halter top last year that still fits and this was the leftover yarn.

I made only two changes. Instead of lifted bar increases at the shoulders (it is knit top-down), I made yarn over increases. They were visible in this marled yarn, where the originals were not. Also it is really hot here most of the year and I thought eyelets looked cooler. The second change occurs in the front where the lapels meet the body. From what I could gather, you are supposed to just let them hang. I stitched the ends onto the top of the back ruffle - and it curves nicely around her body this way. I made the largest size in a size larger yarn, so she will be able to wear this for a while.

Look at that cute sleepy baby hair.

Saturday, September 4, 2010

If Vikings had lived in Austin or Nashville

If Vikings had lived in Austin or Nashville, maybe they'd have had armor made of wool felt (like cowboy hats) riveted with pearl snaps (like western-style shirts.)

Here are loads of pictures of all of the projects that I have been working on for my son Badger's 7th birthday. I think that I've been working for about 2 1/2 months total. mostly mornings before he woke up and in little fits and starts while riding in the car or sitting in waiting rooms.

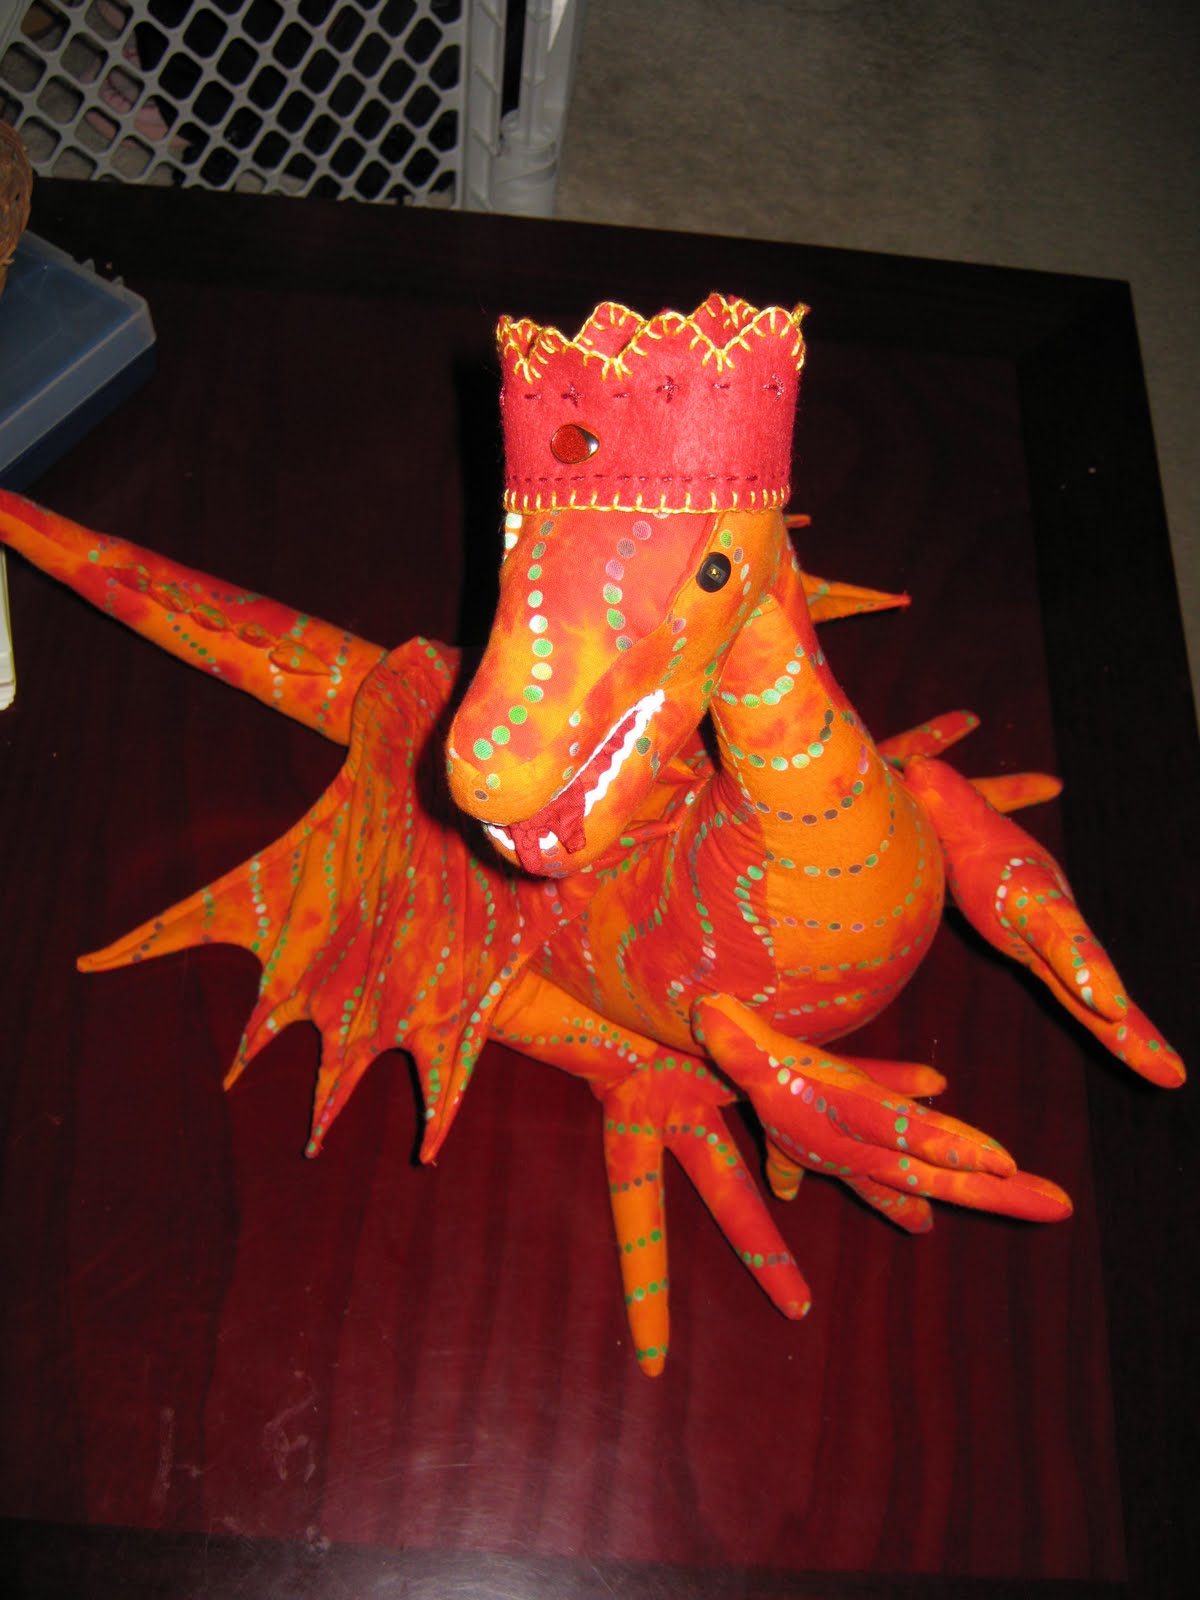
The first thing that I worked on was a large dragon. It is 18 inches tall and about 24 inches long. The fabric is a VIBRANT orange batik that I had in my fabric stash.

It has really lovely wings.

And a lovely smile. The crown just seemed right somehow. I cut a crown out of some red wool felt from the felt stack here at home, and embroidered it with yellow pearl cotton and red metallic embroidery thread - which was a bear to work with. Badger picked the colors for the crown and the gold mylar thread for the centers of the button eyes. He thought that I was making this dragon for his Grandpa Bob, who also likes dragons. This bit iof subterfuge was necessary as it was really hard to hide a large orange dragon. He was very generously making all sorts of design choices so that is Grandpa Bob would really like it. I fooled him.

Badger picked a button from the stash to make a center jewel for the crown. My husband, Matt, helped to remove the metal shank on the back and I glued it on with craft glue.

Badger received the dragon as well as a suit of knit chain mail (hood and hauberk) first thing in the morning. As you can see, he is still waking up. I found both patterns on Ravelry.

The new look for baby fashion this fall is apparently chain mail. With cloth diapers. This is Rose, not Badger.

Badger is not so sure about the look.

The chain mail hood (called a helmet in the pattern) is shaped with short-rows like a sock heel.

I had to make the neck of the hauberk larger because Badger has an enormous head to house his enormous brain.

I made a buckler-type shield for him - also out of wool felt.

Blanket stitched on the edge in pearl cotton. It just made it look less plain.

We used a large, heavy button from Germany for the center boss.

And it has both an arm and a hand strap. To be useful.

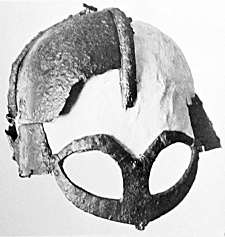
Next I worked on a helmet. Finding a pattern for a helmet that was even remotely realistic was impossible. So I made my own. Actually, I made two. The first one was for a 15th century helmet called a sallet. Because I was insane. The one in the Wiki image with the lobster tails was the original idea.

I made a pattern and then made a paper 3D model. It was ok, but it had buckling on the top, as well as flaring at the bottom. This was an issue. I knew that the wool version would do the same thing. Wool felt does not lend itself to a fairly round smooth look without seams - not so smooth in that case. I could have blocked and steamed it, but I knew that I was going to have an inner layer with heavy interfacing which would not be as malleable as the wool.

I asked around for help with the geometry of the thing, and was put in touch with an armorer that knits. Can you beat that for cool? He was a big help, and his suggestions let me know that there would have to be many more seams than I wanted.

So I looked for something still a little complex, but easy enough for my simple head to figure out. I took a lot of measurements of Badger's head, and added a bit for ease and room to grow. Then I sat with pencil, large eraser and a load of drafting tools and came up with a second pattern. I found some images of the Gjermundbu Viking helmet and someone else's metal version of what it could have looked like. I chose for safety to omit the top spike. My brother sent a link to a Swedish museum pattern for a Viking 6-panel hat. I adapted it using Badger's measurements for a 4-panel helmet. I had two days total to do the helmet, including Badger's birthday itself.

The back had a chain mail piece, so I knitted more mail.

We used pearl snaps instead of rivets. The backs of these are all covered in interfacing and more felt - so no metal bits touch skin.

The outside layer of the helmet by itself.

The inside layer had 2 layers of very stiff and heavy interfacing. I didn't want his helmet to crease or dent.

It looked like a small tent when it was done.

Next came all the hand stitching. The bottom rim is attached to the inside and outside separately. Then the mask part was attached on the inside and outside with invisible ladder stitches. I had whip stitched it in pearl cotton beforehand. The top straps cover the seams and reinforce the helmet . Side pieces are attached with more pearl cotton, using a figure-8 stitch that looks like a herringbone pattern.

The top of the helmet. The pieces were also attached with simple whip stitching.

Happy boy received his helmet after dinner. I also cooked special Gluten-, Dairy-, and Soy-Free cupcakes and a layer cake with homemade chocolate icing. And brown rice and sorghum pancakes for his dinner - he requested pancakes, bacon and eggs for his birthday.

Yes, I am completely out of my mind.

Sunday, July 18, 2010

The Value of Our Handmade Stuff

Here are most of the crocheted and knitted veggies for my daughter's 2nd birthday present. For some reason, the corn didn't make the shot. So we have (total) 11 veggies: corn, tomato, squash, lettuce, asparagus, garlic, beet, radish, carrot, and 2 mushrooms. I made 2 mushrooms because one just seemed lonely somehow.

As I have been making all of the veg for my daughter's present, I have been thinking of how we value handmade stuff. If you are reading this blog, you probably dig handmade already, but how much do you value it?

Do you buy local handmade in support of local artisans? Do you pale at the prices charged for it? I know we can all get a pair of nifty cabled gloves at discount stores for under $20, so paying $60 or better for what could be seen as the same thing seems exorbitant. Consider that the raw materials at retail prices can cost $20 by themselves. Consider that it can take 20 hours or so to knit a pair of gloves with a complex cable pattern. If we paid ourselves fairly for our time, those gloves would cost $220. Now that $60 doesn't seem so bad, does it? Besides which, the workmanship and materials used in the handmade pair mean that those gloves will last you longer than a month or so of fairly constant use. With care, you could pass them down to your kids. Over their lifetime, handmade goods cost far less than the mass-produced equivalent due to their better workmanship. You could pay $60 for one pair of gloves every 5 years (with hard wear) or $10 twice a year or more for store-bought - so $100 for 2 pairs of $10 gloves a year for 5 years.

Do we as makers value our goods as much as we should? Do we consider that when we do our best work, we should charge accordingly? We pay retail prices for our materials (most of us.) We spend HOURS making each individual item. Why do we then devalue our work when we gift it? We say "well, I made this, so if you don't like it, I understand" or some such nonsense (of which I am guilty as well.) Why are we hesitant to charge a fair price when we sell it? Are we really trying to compete with discount store pricing?

I spent HOURS on my daughter's present. I am spending HOURS on the market bag to hold her present. I will be spending HOURS on my son's birthday present - the fabric cutting alone is in it's third day. The materials mostly came from my stash, but I paid retail for all of them. Why do I feel a little guilty for giving them only handmade for their birthdays? No idea. Even though this was a planned thing, I feel like I need to do more. Do more than 50 hours of work for each one? Spend more than I already have, even if lots of stuff came from stash? Doesn't that sound ridiculous? Even as a dedicated handmade consumer and maker, I tend to devalue my own work. How silly. I put love into every stitch, love into every cut of fabric and moment at the sewing machine, love into choosing the materials and patterns.

If you make stuff, value your time, effort, care, and work. It is more than good enough.

Wednesday, July 7, 2010

On Handwork

I saw this short video over on the Mason-Dixon blog site. The importance of it struck so deeply that I felt the absolute need to share it here as well.


Thursday, June 17, 2010

Wool Veg Continued

Well, I've been hard at the veggie-makin'. In addition to the lettuce, we have this large knit garlic from Amigurumi Knits by Hansi Singh. She has some really brilliant shaping techniques in this little item. She has some really brilliant techniques in general. Her patterns are less toy instructions than fiber sculpture instructions. I love this little garlic and may have to make every single thing in her book.
The pattern for this lovely beet was found on Ravelry. It comes out more like an heirloom variety - just perfect for what I am doing. The leaf structure was interesting to do.
The latest one that I have completed is a crocheted carrot from the book Tasty Crochet by Rose Langlitz. There are some interestingly placed decreases that make for a slightly irregular - and more realistic carrot. The carrot tops were also crocheted, but were an improvisation based on the knitted tops from the carrot in Amigurumi Knits. I only made 2, as Rose is going to be 2, and 2 demands slightly more simplified veg.

Next up, a Tomato.